1、下载和编译LLVM LLVM 下载地址:推荐使用git
git clone https://github.com/llvm/llvm-project.git
2、检查是否安装cmake
$ cmake -version
cmake version 3.14.5

CMake suite maintained and supported by Kitware (kitware.com/cmake).
如果没有
brew install cmake
网上教程很多。
3、在llvm 根目录下创建build目录
cd llvm-project
mkdir build
cd build
//这是clang 和llvm 都编译
cmake -DLLVM_ENABLE_PROJECTS=clang -G Xcode ../llvm
//只编译llvm
//cmake -G Xcode -DLLVM_ENABLE_ASSERTIONS=On -DCMAKE_BUILD_TYPE=Debug ../
更多参考:Getting Started with the LLVM System
执行完以后,可以看到llvm 目录下多了一个xcode工程,点击打开,创建所有scheme
然后使用xcode 进行编译,编译过程比较慢,大概30分钟就OK
2、编写第一个Pass代码
我们编写第一个 Pass 的功能很简单,只是输出程序中的每个方法名,操作步骤如下:
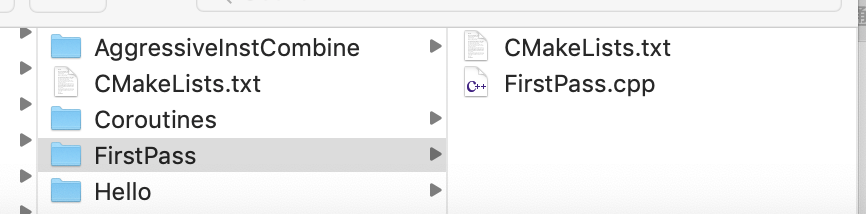
(1)在lib/Transform 目录下新建一个文件夹,文件夹结构可以惨遭Transform 目录下的Hello目录创建。我直接讲hello 复制一份,然后在里边更改: 目录结构如图:
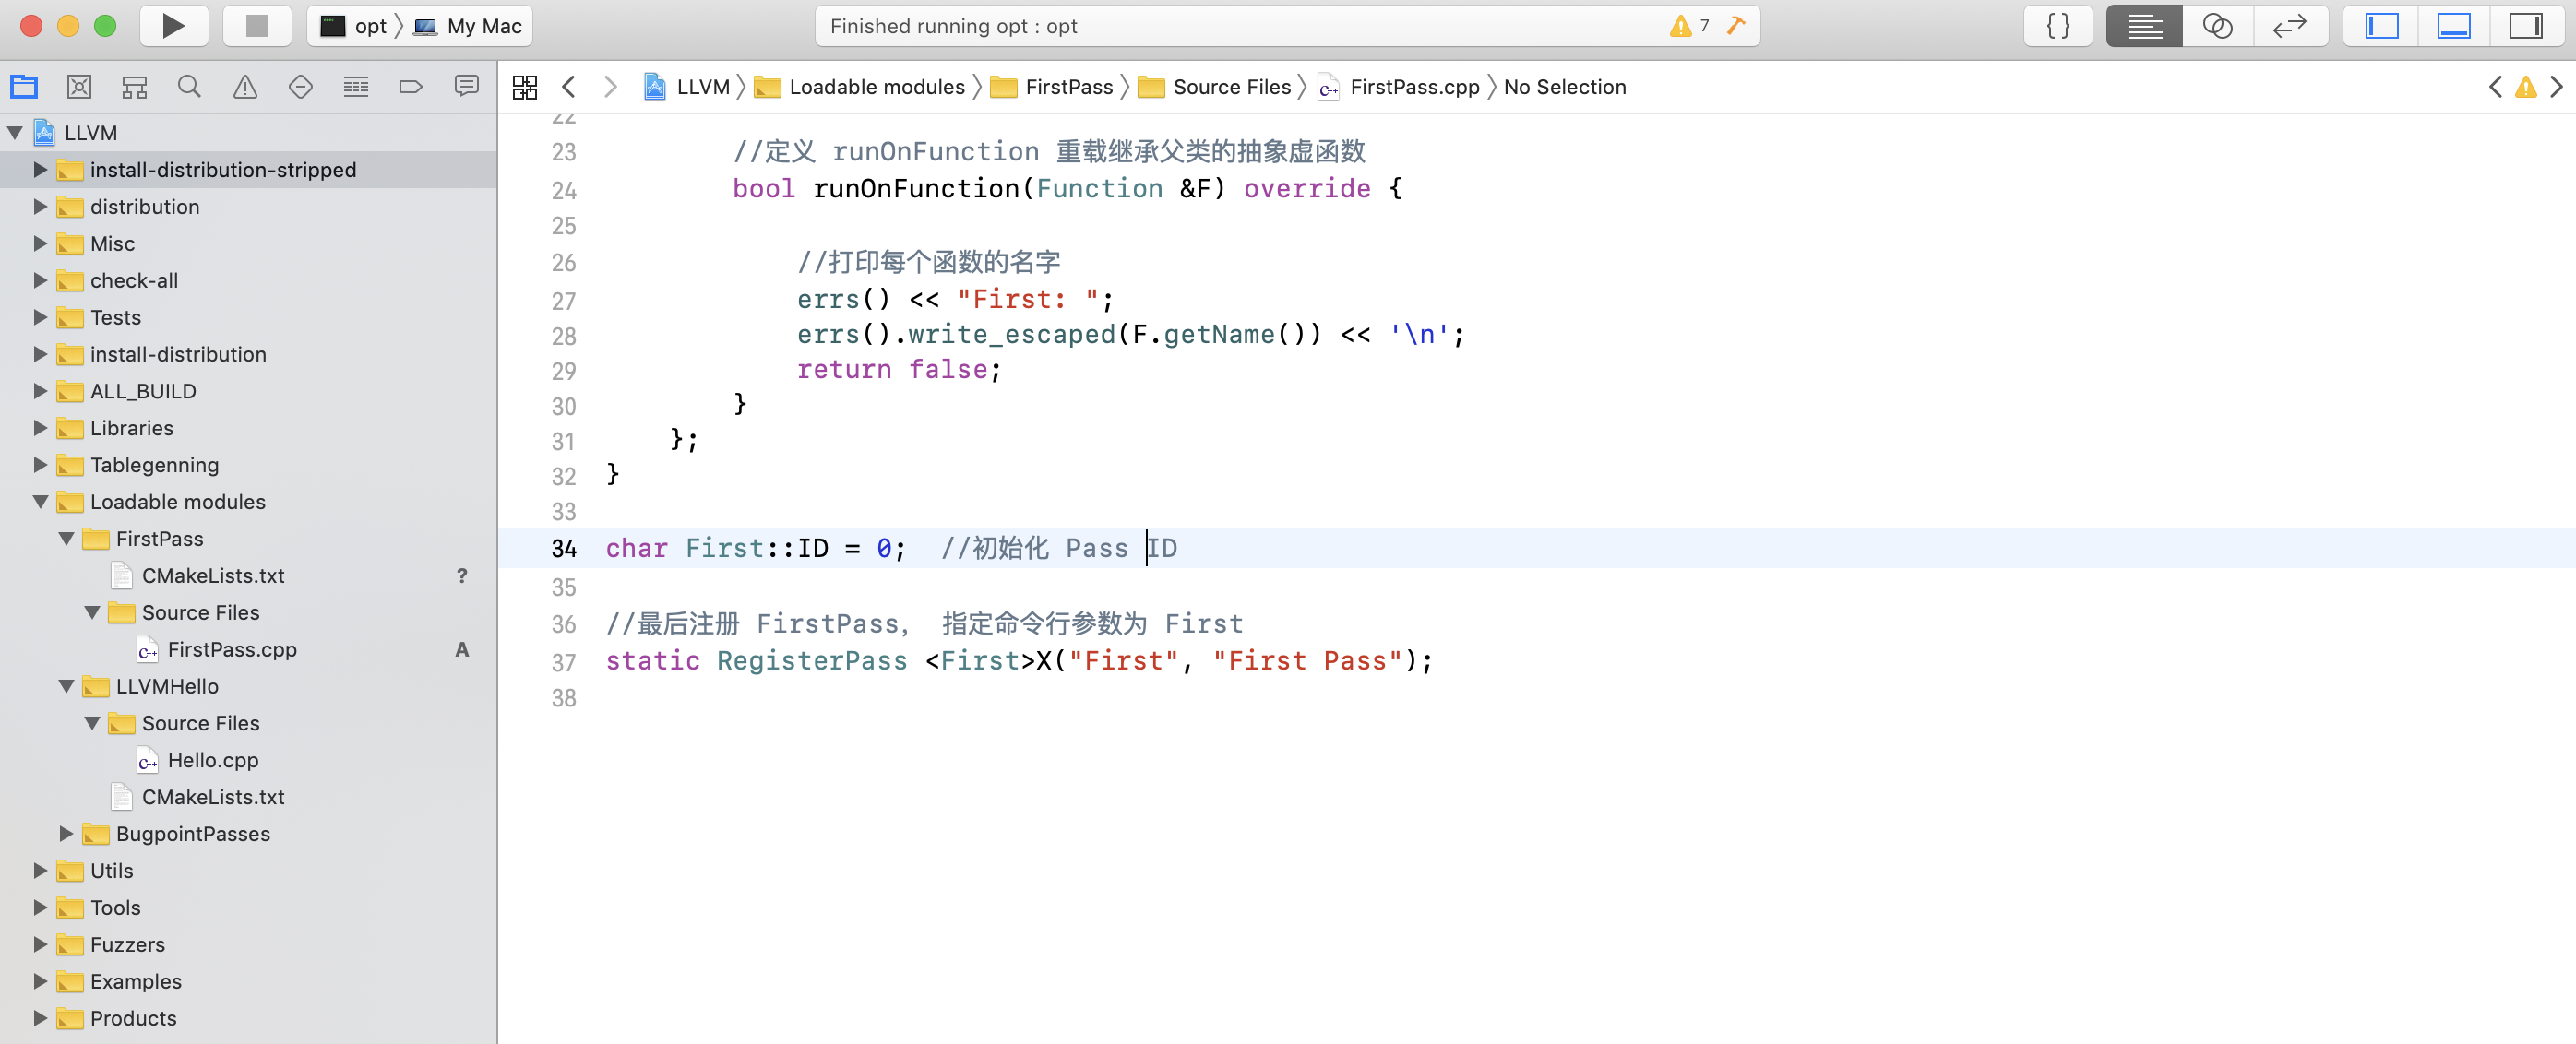
(2)修改FirstPass.cpp ,代码如下:
//导入头文件
#include "llvm/ADT/Statistic.h"
#include "llvm/IR/Function.h"
#include "llvm/Pass.h"
#include "llvm/Support/raw_ostream.h"

using namespace llvm;  //指定所使用的 LLVM 命名空间

namespace {

    //定义 First 类继承自 FunctionPass
    struct First : public FunctionPass {
        static char ID; // Pass ID
        First() : FunctionPass(ID) {}

        //定义 runOnFunction 重载继承父类的抽象虚函数
        bool runOnFunction(Function &F) override {

            //打印每个函数的名字
            errs() << "First: ";
            errs().write_escaped(F.getName()) << '\n';
            return false;
        }
    };
}

char First::ID = 0;  //初始化 Pass ID

//最后注册 FirstPass, 指定命令行参数为 First
static RegisterPass <First>X("First", "First Pass");
(3)修改CMakeLists.txt 文件如下:
if( NOT LLVM_REQUIRES_RTTI )
  if( NOT LLVM_REQUIRES_EH )
    set(LLVM_EXPORTED_SYMBOL_FILE ${CMAKE_CURRENT_SOURCE_DIR}/FirstPass.exports)
  endif()
endif()

if(WIN32 OR CYGWIN)
  set(LLVM_LINK_COMPONENTS Core Support)
endif()

add_llvm_library( LLVMFirstPass MODULE BUILDTREE_ONLY
  FirstPass.cpp

  DEPENDS
  intrinsics_gen
  PLUGIN_TOOL
  opt
  )
(4)修改lib/Transform/CMakeLists.txt 如下:
add_subdirectory(FirstPass)
最后xcode 中目录结构如下:
然后在xcode中选择all_build 点击编译,target 中就会出现FirstPass。或者使用命令行
cd build
cmake -G Xcode CMAKE_BUILD_TYPE="" Debug ../
最后编译:编译成功后会生成一个LLVMFirstPass.dylib 的动态库。
到这一步,只是编译成功了,接下来就是加载和调试。
3、我们写一段测试代码
(1)编写一段测试代码:
#include <stdio.h>

int test() {

        printf("test\n");
        return 0;
}
int main(){

        int num = 1;
        printf("main %d\n", num);
        test();
        return 0;
}
编译源文件
clang -emit-llvm -c test.c -o test.bc
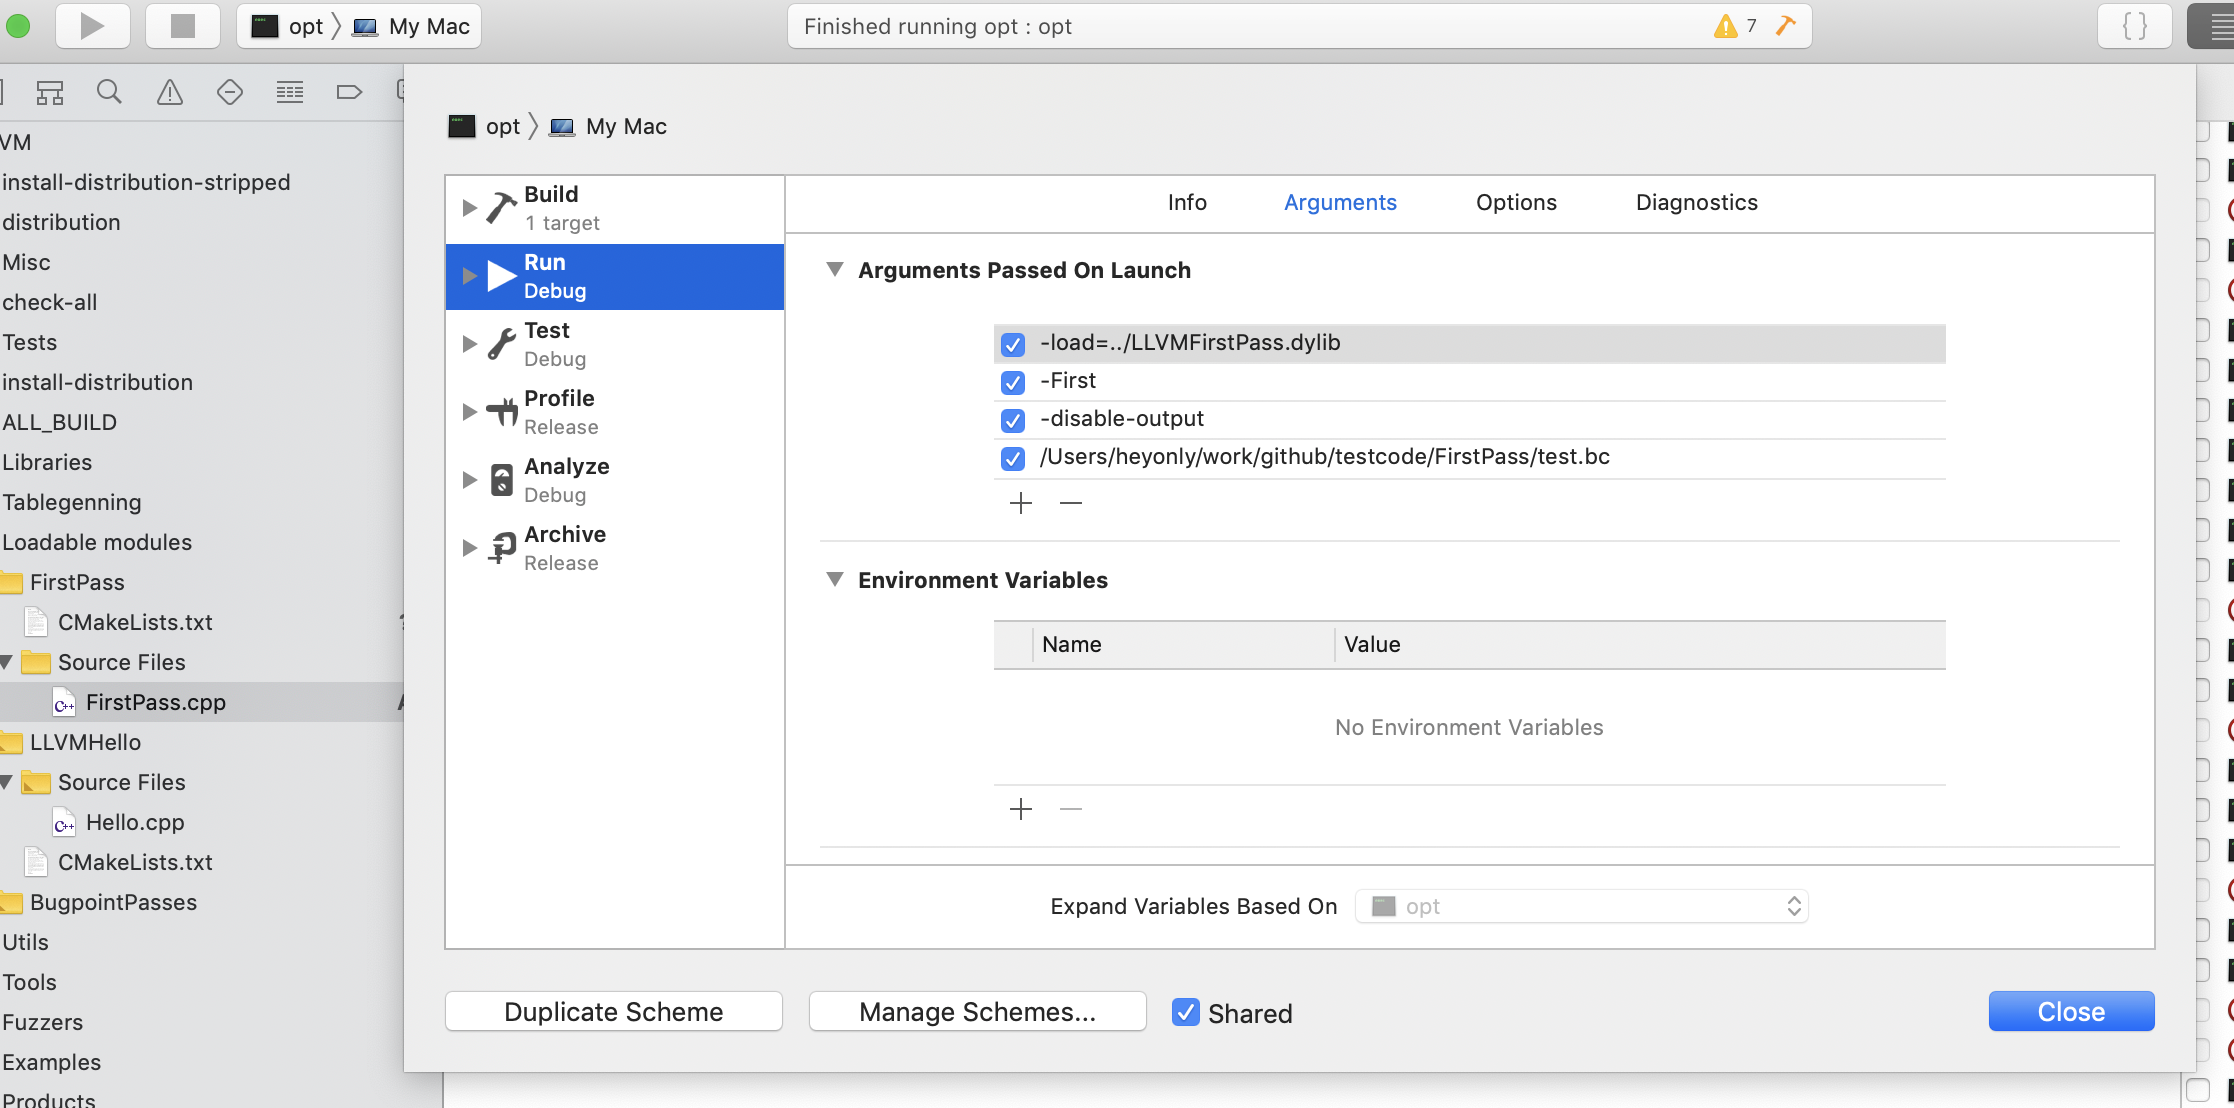
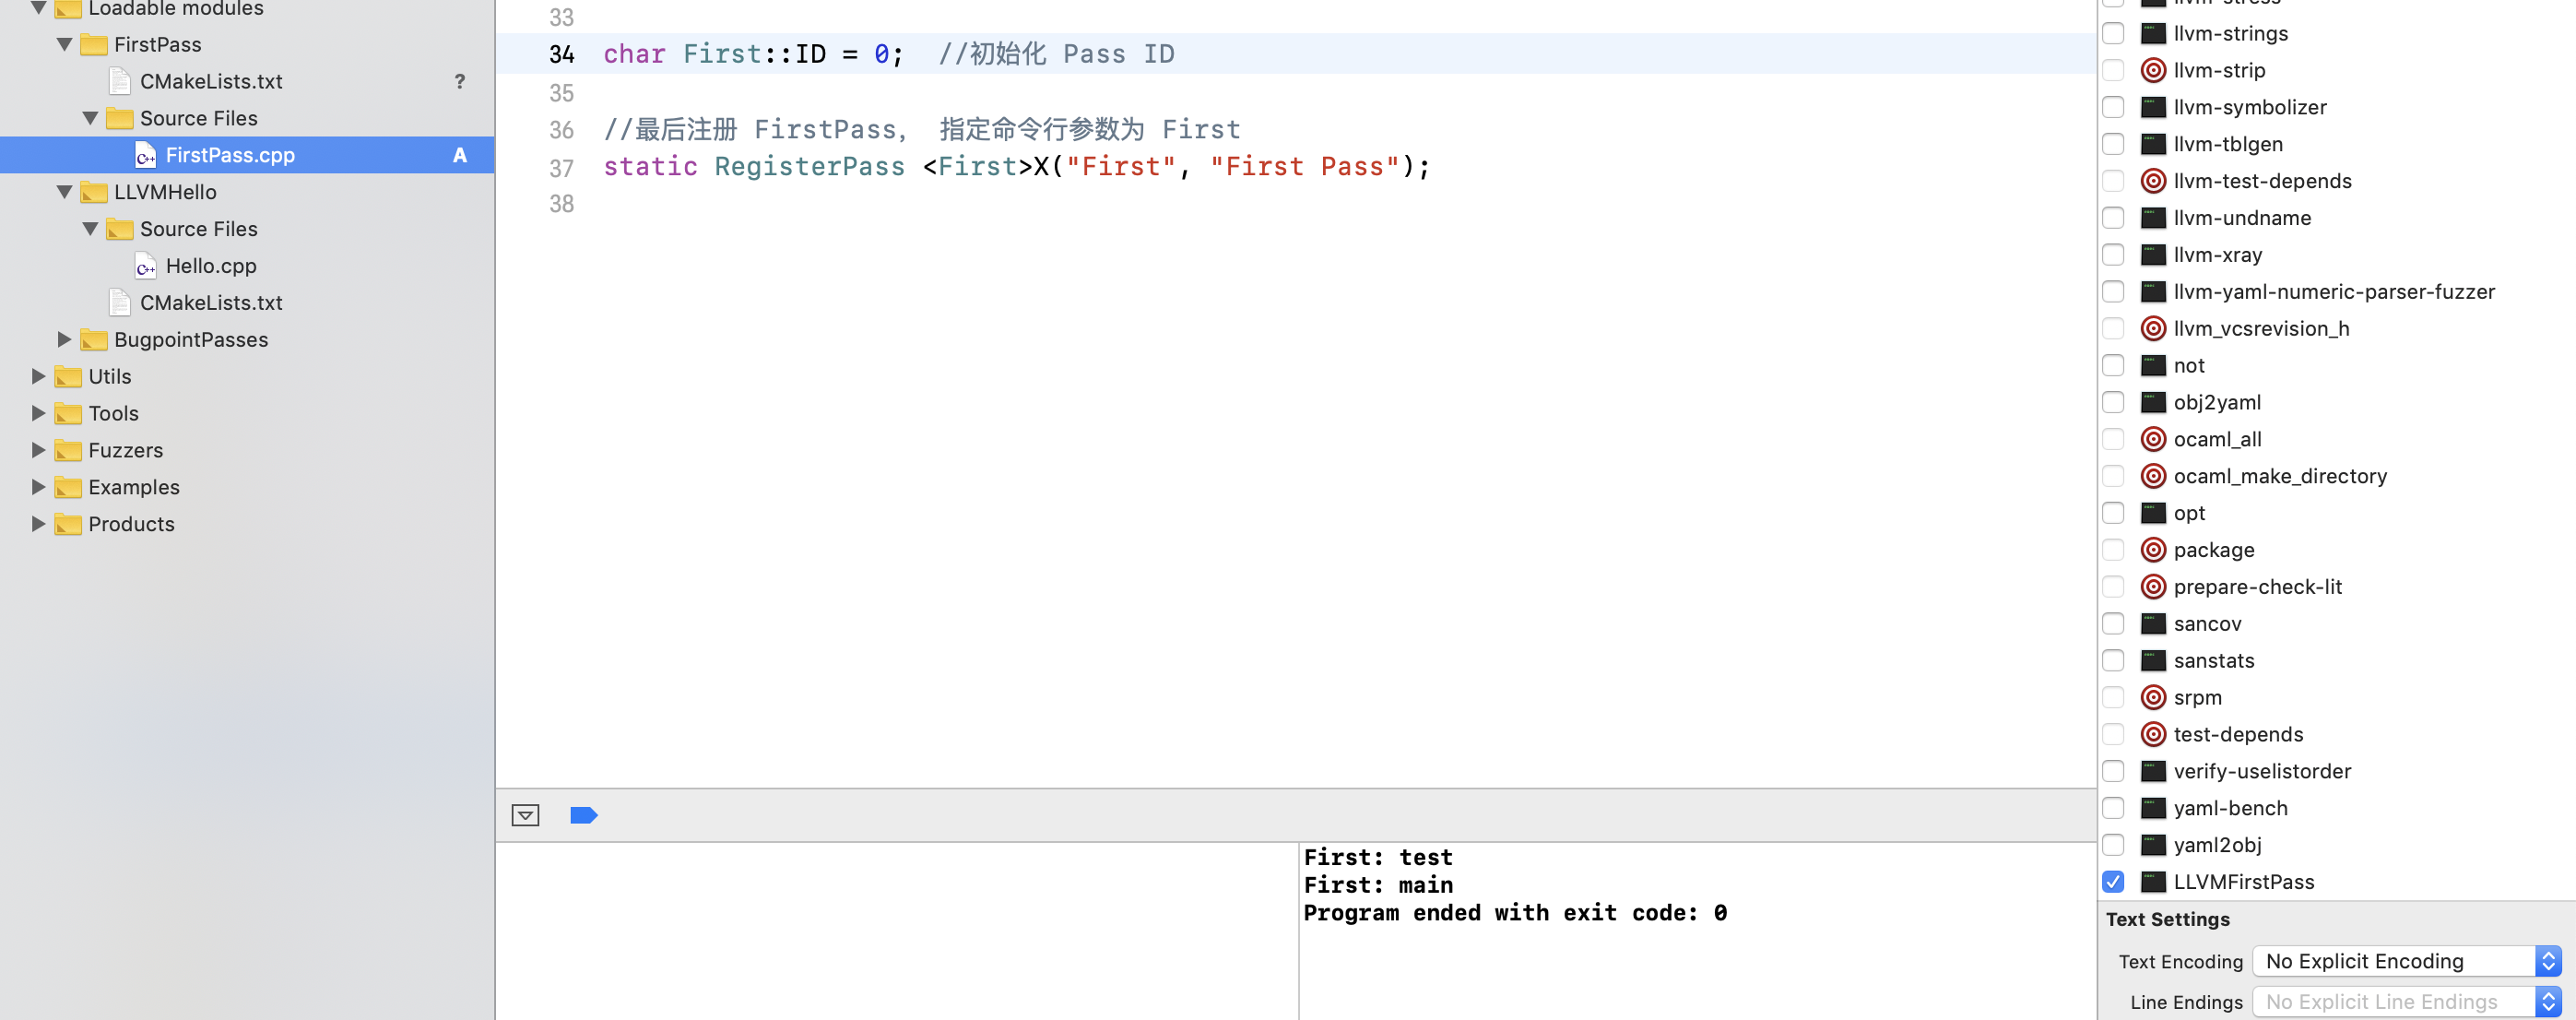
(2)调试
如图所示:
成功,完美输出结果
另外,我在编译的时候遇到一个问题,当时编译的时候没有记录下来错误。最后查出来是因为xcode-select 设置不正确。将xcode-select 设置正确后,解决。
参考: